Learn how to remove trim molding effectively with our Mold Solutions Guide. Discover the best techniques and tools to safely eliminate mold from your home’s trim molding.
How to Safely Remove Trim Molding to Combat Mold Issues
How to Safely Remove Trim Molding to Combat Mold Issues
When dealing with mold problems in your home, it is crucial to address all areas where mold may be present, including behind trim moldings. To safely remove trim molding to combat mold issues, follow these steps:
1. Prepare the area: Before starting, make sure to wear protective gear such as gloves, a mask, and goggles to avoid exposure to mold spores.
2. Inspect the molding: Carefully examine the trim molding for any signs of mold growth. If you see visible mold, it’s essential to proceed with caution.
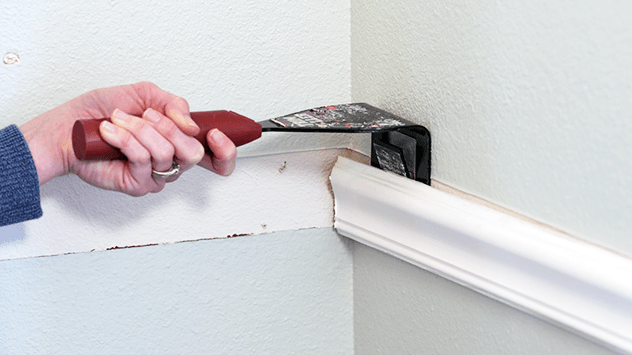
3. Remove the molding: Use a utility knife or a pry bar to gently lift and remove the trim molding from the wall. Be careful not to damage the surrounding surfaces.
4. Clean behind the molding: Once the trim molding is removed, thoroughly clean the area behind it using a solution of water and detergent or a commercial mold cleaner.
5. Inspect for mold: After cleaning, inspect the area for any remaining mold growth. If mold is still present, consider contacting a professional mold remediation service.
6. Replace or repair the molding: Depending on the extent of mold damage, you may need to replace the trim molding altogether or repair it if possible.
By following these steps, you can safely remove trim molding to combat mold issues and prevent further mold growth in your home.
Frequently Asked Questions
How can I safely remove trim molding infected with mold?
Remove the trim molding safely by following these steps:
1. Wear protective gear such as gloves, a mask, and goggles.
2. Seal off the area to prevent mold spores from spreading.
3. Use a mold removal solution or mixture of water and detergent to clean the mold-infected trim.
4. Scrub the mold off the surface with a brush or sponge.
5. Dispose of the trim properly in sealed bags to prevent further contamination.
What tools do I need to remove trim molding as part of mold remediation?
The tools you need to remove trim molding as part of mold remediation typically include a pry bar, hammer, utility knife, and a caulking gun.
Is it necessary to replace trim molding after removing it due to mold?
No, it is not always necessary to replace trim molding after removing it due to mold.
Are there specific safety precautions to follow when removing trim molding contaminated with mold?
Yes, there are specific safety precautions to follow when removing trim molding contaminated with mold.
Can I reuse trim molding after cleaning it from mold contamination?
Yes, you can reuse trim molding after cleaning it from mold contamination as long as it has been effectively cleaned and treated to prevent future mold growth.
In conclusion, effectively removing trim molding is a crucial step in addressing mold issues within your home. By following the proper techniques and utilizing the right tools, you can successfully eliminate mold growth and prevent its reappearance. Remember to always wear protective gear and work in a well-ventilated area when dealing with mold and mold-contaminated materials. With these considerations in mind, you can create a healthier living environment for you and your family.
![]()